In the first post of this series I have shown how you can interact with Visual Studio Online using Hubot.
For simplicity, I’ve only shown how you could use hubot from Campfire (since it’s what is installed out of the box) to issue commands against Visual Studio Online.
On this post I will explain how you can do the same, but using Visual Studio Online team rooms instead of campfire.
Using Team Rooms, has some advantages over campfire. It’s integrated with Web Access, you easily integrate automatic posting of messages to two rooms with an easy interface (to be fair, Visual studio online, provides service hooks to achieve the same effects to other chat rooms, but you have to manage them with more work), links are shown on multi lines and you can even use Team rooms directly from Visual Studio with this cool extension
In the previous post I wrote that there were two ways to extend hubot. Scripts and Adapters. Scripts are responsible for implementing commands to interact with external systems and adapters are used to implement the communication between hubot and the chat room (or an IM client).
I guess it’s easy to guess by now, we are going to add a Visual Studio Online team room adapter to our hubot installation.
Operation Model and Requirements
The Visual Studio Online hubot adapter, has a different model of campfire. Hubot Campfire adapter opens a connection to Campfire and continually listens (in streaming mode) to commands on campfire room(s), whereas the Team Room adapters works with events.
The team room adapter opens a http/https listener and receives events from Visual Studio Online via service hooks events.
This means that your hubot needs to be publicly available on the internet to be called by Visual Studio Online.
If you can’t or don’t want to have Hubot publicly exposed on the internet, you can place it behind a firewall since the adapter is capable of fetching data from an Azure Service Bus queue. If that mode is enabled, the adapter will not work in a event mode but in a polling mode.
Event mode is the recommended model of operation, since it is more efficient. Not only it spends less resources, it’s also faster (and cheaper)
But before going into that, let’s start with some pre requisites.
Setting Hubot Credentials
Note: If you are running Hubot in trusted mode, this account can be shared with Visual Studio Online hubot scripts configured in the first post of this series.
You need create an user for Hubot be able to listen to commands on Team Room and respond to them. I’m going to omit detailed steps to create an account, but in simple terms you need to:
- Create a Microsoft Account
- Login to Visual Studio Online and enable alternate credentials
- Assign a license to the user
- This user requires either an advanced account or an account with permissions to access a team room
- You can get more information how to get a license for an account on Get more user licenses for your account
- Give permission to all team rooms you want Hubot to be active on.
Tip: When you enable alternate credentials, set the display name to Hubot and the profile image (with an appropriate hubot image)
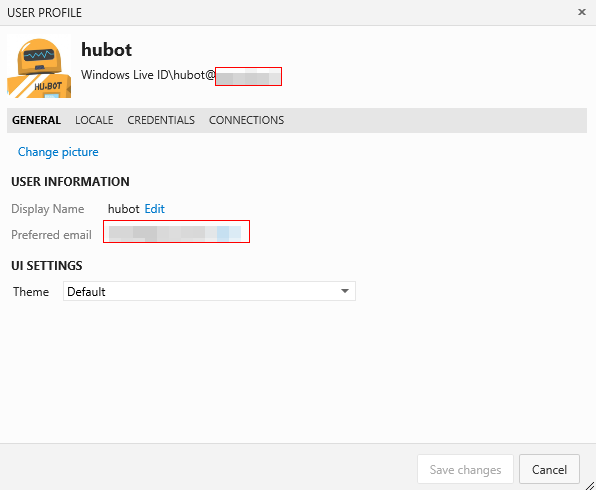
This way, when Hubot replies, you will see it’s name and image as the avatar
Installing the Hubot Visual Studio Online adapter
In order to use Visual Studio Online Team Rooms instead of campfire (the default adapter) you need to install hubot-vsonline.
Since the adapter, is available as an npm package, all you need to do is issue the command
npm install hubot-vsonline
on hubot folder.
Configuring the adapter
In order to configure the adapter you will need to set a bunch of environment variables.
If you have an Eidetic memory and remember my first post, you will notice some of these parameters are shared with the Visual Studio Online Hubot scripts (which is not a coincidence😀)
General Parameters
These parameters are mandatory
- HUBOT_VSONLINE_ACCOUNT The name of your account. (don’t include visualstudio.com it’s only the account name)
- HUBOT_VSONLINE_USERNAME the username of the account you created earlier in section Setting Hubot Credentials (either the primary or the secondary username)
- HUBOT_VSONLINE_PASSWORD The password you have set up for the alternate credential
Listeners Authentication
Since your HTTP/HTTPS listeners are exposed on the internet, it’s better that they are protected with some form of authentication otherwise anyone who knows your hubot your endpoints could try to inject commands into your hubot (they wouldn’t be able to see the responses but there is potential for harm).
The listeners can be configured with basic authentication. It is recommended you enable basic authentication (in fact it may be mandatory depending on how you configure service hooks. More on that later)
These parameters are optional.
- HUBOT_VSONLINE_ADAPTER_BASIC_AUTH_USERNAME – The username for the adapter HTTP/HTTPS listener
- HUBOT_VSONLINE_ADAPTER_BASIC_AUTH_PASSWORD – The password for the adapter HTTP/HTTPS listener
- HUBOT_URL The url where the listener is configured. You shouldn’t really need to change this (by default it’s /hubot/messagehook)
Rooms
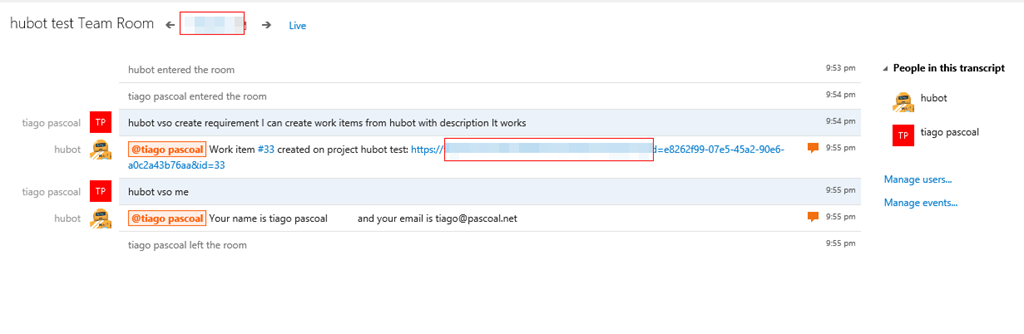
- HUBOT_VSONLINE_ROOMS – The list of rooms (names separated with commas) of the rooms you wish Hubot to join.
Note: Joining a room doesn’t mean hubot will listen to commands. It only means hubot wlll be visible to users (more on that later)
Parameters to configure SSL
Note: If you have installed Hubot in which node is NOT setting up it’s own listener and the host provides you a reverse proxy (with HTTPS capabilities), this step is not necessary. For example this happens when node is hosted inside IIS (using IISNode) or a PaaS provider like Heroku or AppHarbor, in that case you can skip this step.
SSL is not mandatory, but it is off course it recommended that you use it.
Those are the minimum set of parameters you need to enable SSL
- HUBOT_VSONLINE_SSL_ENABLE – Set this variable to true to enable SSL
- HUBOT_VSONLINE_SSL_PRIVATE_KEY_PATH – The file path to your SSL private key
- HUBOT_VSONLINE_SSL_CERT_KEY_PATH – The file path to your certificate
These parameters are optional
- HUBOT_VSONLINE_SSL_PORT – SSL port. By default it’s set to 443
- HUBOT_VSONLINE_SSL_CA_KEY_PATH – The path the certificate authority certificate (default is null)
- HUBOT_VSONLINE_SSL_REQUESTCERT – If we should request a client certificate (default is false)
- HUBOT_VSONLINE_SSL_REJECTUNAUTHORIZED - Check certificate against CA list. (Defaults to false)
Note: There is a caveat in using SSL, you must use a valid certificate, in other words a certificate that is signed with a known certificate authority.
Launching Hubot with Visual Studio Online adapter
We are now ready to launch Hubot.
To use another adapter you either set environment variable HUBOT_ADAPTER with the value hubot-vsonline or when you launch hubot daemon pass the variables “-a vsonline”
Setting up Service Hooks.
Hubot commands are sent to hubot via service hooks. So before hubot can respond to commands issued on Team Rooms, you need to set up at least one service hook.
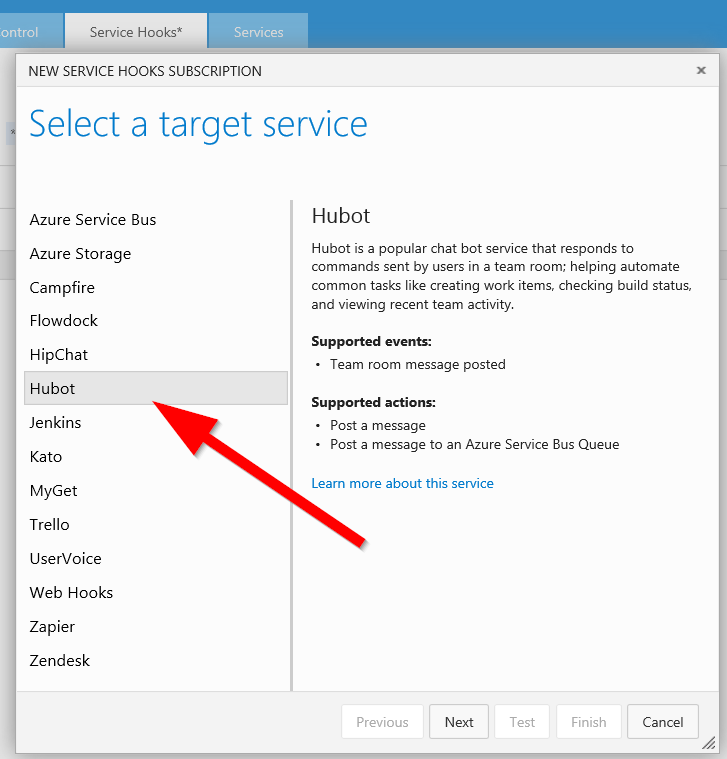
You have to configure one service hook per room. Go to visual studio online backoffice and create a new service hook on the Service Hooks tab.
With SSL
There are two ways, to configure a service hook. If you are using SSL (recommended) then you have a service hook that is specific to Hubot.
Press Next and select the Team Room on the FILTERS section and then press Next.
Select “Post a message” on the Perform this action section, and enter your hubot url (unless you changed the default value it should be https://<hubot> address>/hubot/messagehook) and the username and password you configured in the section Listeners Authentication)
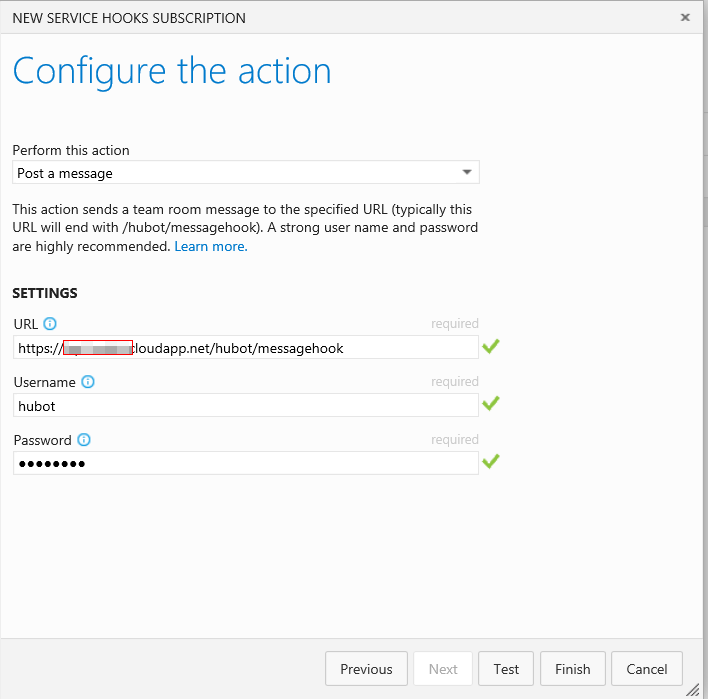
Click finish and you are now ready to start issuing commands on the configured team room.
Remember you should configure the service hooks for all team rooms you wish Hubot to listen to commands.

Without SSL
If your hubot doesn’t has SSL capabilities (off course this service hook also supports SSL), you can use as an alternative the generic “Web Hooks” and use the following parameters
- Trigger on this type of event – Team room message posted
- Team room – select the team room
- URL – Hubot listener URL
- Resource details to send – All
- Messages to send – None
- Detailed Message to send – None
Basic authentication is optional (not recommended at all😀)
Next Post
In the third and last post of this series, I will explain how you can install an Hubot instance running on an Azure Web Site