Azure DevOps is quite an extensible product product; you can develop your extensions that can be used privately on your organization or made publicly available on the marketplace.
There is a wide range of extensions you can write, from Azure Pipelines tasks to extensions that blend in the UI (e.g., a context menu) or add more complete functionality with its own hub.
It is common in big organizations to have their extensions but don’t want them visible on some team projects/users; sometimes they only want to hide some features and not the full extension or even introduce preview features and let users opt-in until it’s “ready” for general consumption.
There are many scenarios, but regardless of the use case, all share a commonality, the need to enable/disable features in a simple way.
Extensions could implement this on their own; it means they would have to use some storage mechanism, implement the user interface, the API with authentication, etc. However, even if they did, they couldn’t solve all the problems, for example, to disable an entire hub, they could disable the hub functionality, but the hub would still be visible for users which adds visual pollution and not very user-friendly.
Fortunately for us, that capability is already built-in.
From a development perspective, you need to perform two steps. All declarative, no need for any coding:
- Declare the feature(s) you want to toggleable.
- Declare which contribution(s) the feature enables/disables.
Feature
A feature is a target that allows you to define a feature that can be enabled/disabled at three different scopes:
- Organization
- Team Project
- User level
Lowest scopes always prevail over higher scopes, so you can have a feature enable for an entire team project and still disabled for a given user (and vice versa).
Defining a feature
A feature is defined, by adding an element to the contributions array in the extension manifest with a ms.vss-web.feature type and targeting ms.vss-web.managed-features.
The description element has the description has in the appears in the UI.
In the properties element, you can use the following values:
- name to define the name that appears in the UI
- userConfigurable (boolean) Can the user enable/disable the feature at an individual level
- hostConfigurable (boolean) Can the feature be enabled/disabled at the team project level
- defaultState (boolean) Is the feature enabled or disabled by default (true if omitted)
- hostScopes (array) Scopes in where enabling/disabling can occur.
projectfor team project andnullfor organization scope. - order The order in which the feature appears on the list.
Below you have an example of a feature. It has the three scopes and can be configured both at the org level, project level or at the user level.
{
  "id": "FEATURE-ID",
  "type": "ms.vss-web.feature",
  "targets": ["ms.vss-web.managed-features"],
  "description": "An example of a toggleable feature",
  "properties": {
    "name": "Enable My Feature",
    "userConfigurable": true,
    "hostConfigurable": true,
    "defaultState":  true,
    "hostScopes": ["project", null]
  }
}
Enabling/disabling features
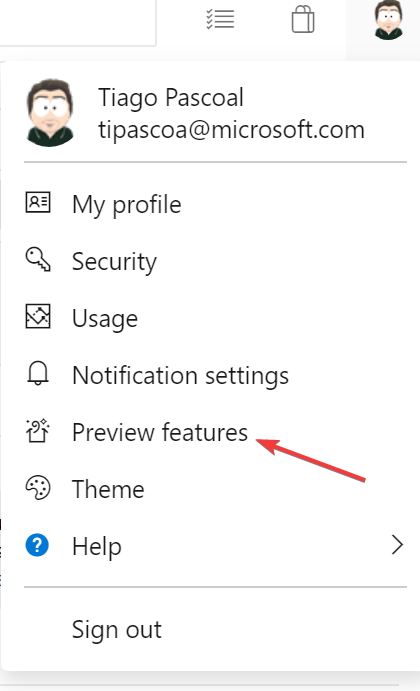
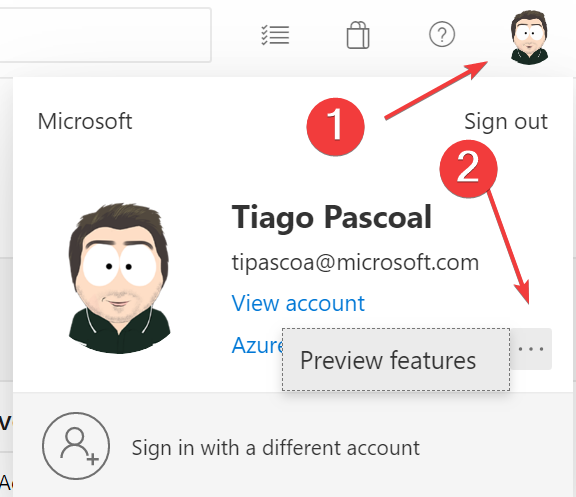
Once you have defined the feature, users can enable/disable it on the Preview Features menu in the user profile.
alternatively, if you have enabled the preview feature New account manager
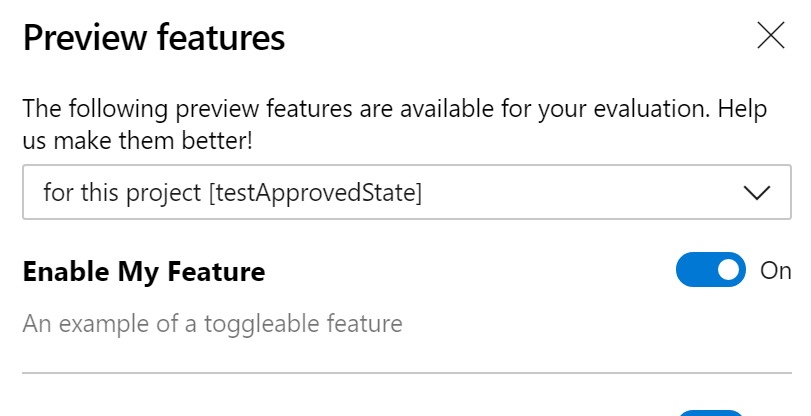
The feature of the example above is now toggleable on the UI
Associating a feature with a contribution
Now the feature has been defined, and users can enable/disable it, but that has no consequences until we associate the feature with a contribution (or more).
Let’s assume we have the following element in our extension.
{
  "id": "hello-world-hub-group",
  "type": "ms.vss-web.hub-group",
  "description": "Hello World hub group",
  "targets": ["ms.vss-web.project-hub-groups-collection"],
  "properties": {
    "name": "Hello World",
    "icon": {
      "dark": "img/world.png",
      "light": "img/world.png"
    }
  }
},
{
    "id": "hello-world-hub",
    "type": "ms.vss-web.hub",
    "targets": [".hello-world-hub-group"],
    "properties": {
      "uri": "hello-world.html"
    }
}
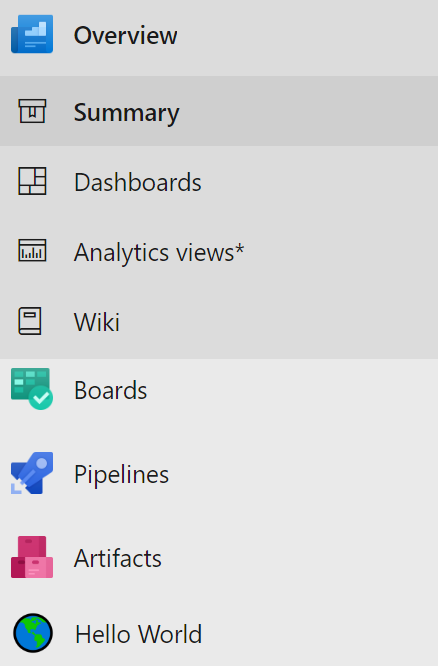
This adds an Hello World hub to all team projects
To enable/disable the feature, we need to add a constraint to the contribution point to the feature id that will enable/disable the feature.
For the example we have been using, it should add something like this.
{
    "name": "Feature",
    "properties": {
      "featureId": "PUBLISHERID.EXTENSIONID.FEATURE-ID"
    }
}
The feature id is the fully qualified identifier, so it has to include your publisher id as well as the extension id. So everything that is in uppercase needs to be replaced with actual values
So we now take the hello-world-hub contribution definition and add a constraints element (it’s an array)
{
    "id": "hello-world-hub",
    "type": "ms.vss-web.hub",
    "targets": [".hello-world-hub-group"],
    "properties": {
      "uri": "hello-world.html"
    },
    "constraints": [
        {
          "name": "Feature",
          "properties": {
            "featureId": "PUBLISHERID.EXTENSIONID.FEATURE-ID"
          }
        }
    ]
}
We can now disable/enable the feature at will and the hello world hub, appear or disappears based on feature value.
As you can see, it’s quite simple to use features in your Azure DevOps extension without no coding whatsoever.
In the example, we used a hub, but the constraints element can be added to any contribution to make it toggleable.
If you need an easy way to bootstrap an extension, there is a yeoman generator that can speed up the process. Take a look at Azure DevOps extension generator