In the first post of this series, we introduced GitHub Copilot Extensions and discussed the two types of extensions. Client side and server side extensions.
This post covers the basics of creating a GitHub Copilot Extension for VS Code. Future posts in this series will explore more advanced concepts and refinements.
Goal
This guide walks through creating a simple GitHub Copilot Extension for VS Code. We’ll focus on the core extension features and development process, using a basic example that will be enhanced in future posts. Rather than getting lost in implementation details, we’ll emphasize the key concepts and capabilities of Copilot Extensions by using a simple sample.
Tip
The complete source code for this tutorial series is available on GitHub. These posts will guide you through building this extension step-by-step, from initial setup to the final version you see in the repository.
This simple example extension acts like a chat parrot, repeating what you type in the chat window. You can optionally have it repeat your message in pirate or Yoda style.
Bootstrapping a VS Code Extension
To create a GitHub Copilot Extension, we’ll first build a standard VS Code extension and then enhance it with Copilot capabilities. Let’s start with the basics of VS Code extension development.
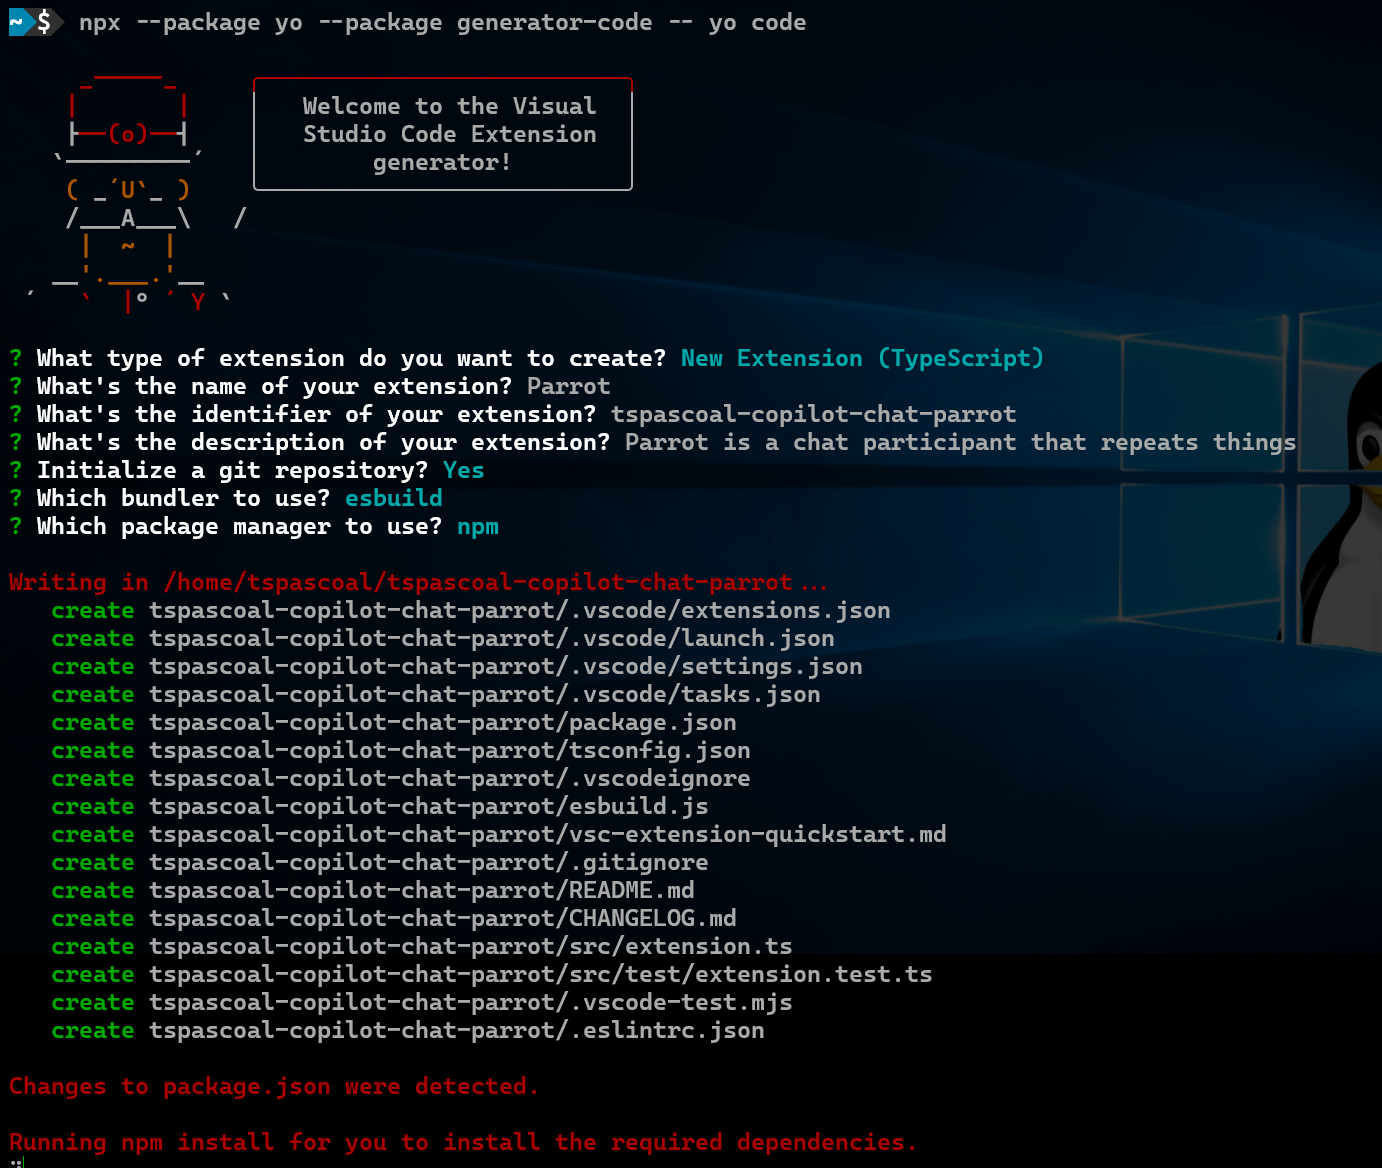
The easiest way to create a VS Code extension is using the VS Code Extension Generator. a Yeoman generator, you can install it with npm install -g yo generator-code and then run it with yo code, answer a few questions and you have a new VS Code Extension scaffolded for you.
If you don’t want to install Yeoman, you can just run this command npx --package yo --package generator-code -- yo code instead.
Upon running the generator I’ve used the following inputs:
- What type of extension do you want to create?
- New Extension (TypeScript)
- What’s the name of your extension?
- Parrot
- What’s the identifier of your extension? (parrot)
- tspascoal-copilot-chat-parrot
- What’s the description of your extension?
- Parrot is a chat participant that repeats things
- Initialize a git repository?
- Y
- Which bundler to use?
- esbuild
- Which package manager to use?
- npm

Tip
For more details on VS Code extension development, see the official documentation.
Adding Copilot Features
Now that we have a basic VS Code extension, we can start adding GitHub Copilot features. We’ll begin by registering a chat participant, which is a function that receives a chat message in the Copilot Chat canvas and returns a response to be displayed on the same canvas. We’ll then implement the chat participant to demonstrate the basic functionality of a Copilot Extension.
Register Chat Participant
With our VS Code extension scaffolded, let’s start adding GitHub Copilot integration capabilities.
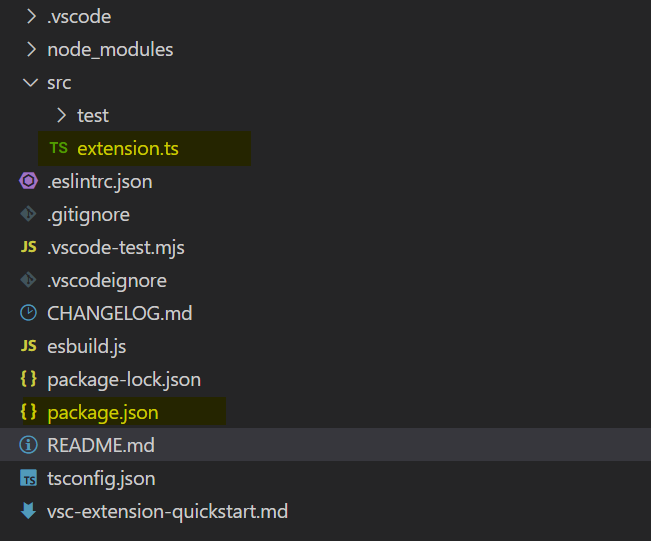
After scaffolding, our extension has two key files:
src/extension.ts- The main extension entry pointpackage.json- Extension manifest and configuration
In this section, we’ll explore these two critical files that form the foundation of our extension.

First, we need to add dependencies on the GitHub Copilot extensions. Add the following to your package.json file after the activationEvents section:
{
  ...
  "extensionDependencies": [
    "github.copilot",
    "github.copilot-chat"
  ]
  ...
}
Next, we’ll add a chat participant to the contributes section in package.json. A chat participant is a function that:
- Receives messages from the Copilot Chat canvas
- Processes those messages
- Returns responses to be displayed back in the chat
We can ignore the auto-generated tspascoal-copilot-chat-parrot.helloWorld command for now.
{
  ...
  "contributes": {
    "chatParticipants": [
      {
        "id": "tspascoal.copilot.parrot",
        "name": "parrot",
        "fullName": "Parrot",
        "description": "Who knows that this does. It just repeats things.",
        "isSticky": true,
        "commands": []
      }
    ]
  }
Let’s look at the key attributes in our chat participant configuration:
idandnameare the most important:id: Links the chat participant to its implementation codename: Used to address the participant in chat (e.g.,@parrot)
isSticky: When enabled, subsequent messages automatically go to this participant without needing to retype@parrotprefix
To test the extension:
- Press F5 or select
Run -> Start Without Debugging - A new VS Code window will open
- Open Copilot Chat (Ctrl+Alt+I on Windows/Linux, Cmd+Alt+I on Mac)
- Type
@parrot hello worldand press Enter
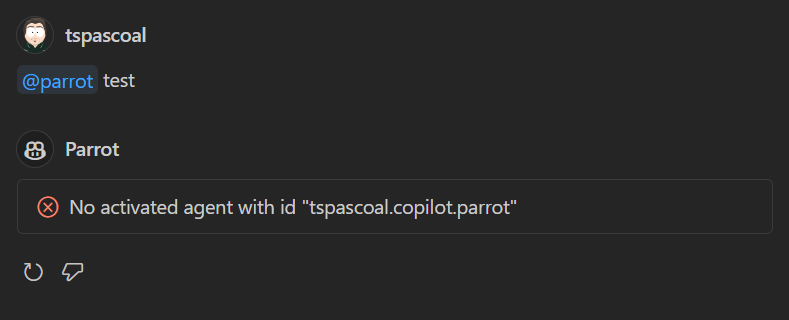
Spoiler Alert: This won’t work yet - we still need to implement the participant’s logic.

While our chat participant is now defined and appears in the agent list when typing @ in the chat window, it won’t function until we implement its logic. Let’s tackle that implementation next.
Registering the Chat Participant code handler
Let’s register our chat participant in the extension’s activation function. Open src/extension.ts and locate the activate function - this is where we’ll add our participant registration code since it’s called when VS Code loads our extension.
	const participant = vscode.chat.createChatParticipant('tspascoal.copilot.parrot', (request, context, response, token) => {
		response.markdown(request.prompt);
	});

	context.subscriptions.push(participant);
To test the changes:
Restart the extension:
- Click the restart button in the debug toolbar, or
- Stop and start the extension again (F5) or just start if you previosuly closed it.
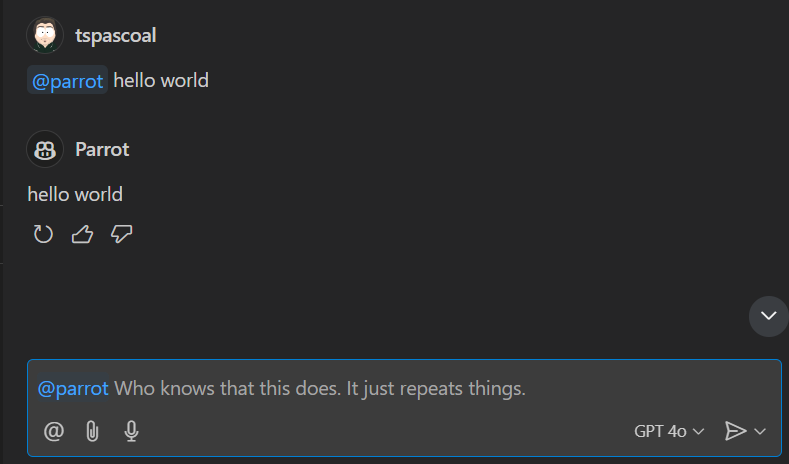
In the Copilot Chat window:
- Type
@parrot hello world - Press Enter to see the response
- Type

Congratulations! We’ve created our first GitHub Copilot Extension. While it simply echoes messages back for now, it demonstrates the basic extension structure and chat participant implementation. In upcoming posts, we’ll enhance it to leverage Copilot’s AI capabilities for more sophisticated interactions.
Tip
You can now refactor the code, so the handler is implemented in a separate file.
Customizing the Image
Let’s add a custom icon to make our extension more visually appealing:
- Choose a parrot icon (I used this one)
- Create an
imagesfolder in your project root - Save the icon in the
imagesfolder - Update the extension to use the custom icon
Open src/extension.ts and add the icon configuration to the activate function.
participant.iconPath = vscode.Uri.joinPath(context.extensionUri, 'images', 'parrot_1747903.png');
(make sure you have the right folder and filename)
once again, let’s start the extension and type @parrot hello world in the chat window and press enter, you will see the following:
![]()
We have now a friendly parrot icon for our extension.
References
Here are some references that you might find useful:
- VS Code Extension Guide
- VS Code Chat Extensions
- Tutorial: Build a code tutorial chat participant with the Chat API
Next In Series
Next up: Enhancing Our parrot extension with Copilot AI: Adding pirate and Yoda Speech Styles in the GitHub Copilot Extensions: Integrating an LLM into a VS Code Extension.