In the first post of this series, we introduced GitHub Copilot Extensions and discussed the two types of extensions: client-side and server-side extensions.
In our previous post on Adding User Configurable Settings in VS Code Extension, we enhanced our VS Code Copilot extension by adding user-configurable settings to control extension behavior and features.
Goal
Agentic AI is rapidly transforming the technology landscape. Enterprises and startups are racing to adopt agentic architectures that move beyond simple automation to deliver autonomous, outcome-driven solutions. Unlike traditional generative AI, which primarily generates content or insights, agentic AI systems can proactively execute multi-step tasks, make decisions in real time, and adapt to changing contexts without human intervention.
The surge in demand is driven by the need for greater efficiency, sharper decision-making, and instant, personalized experiences across industries—from customer service and cybersecurity to supply chain management and content creation.
A key enabler of this shift is tool calling, which allows AI agents to securely and dynamically access external tools, data, and services. The Model-Callable Protocol (MCP) facilitates this by enabling agents to discover and interact with various servers—databases, CRMs, cloud storage, or IoT devices—without custom integrations. This enables agents to orchestrate complex workflows like event planning or cybersecurity troubleshooting through standardized tool calls. MCP’s approach streamlines integration, enhances security, and makes AI agents more versatile and enterprise-ready.
By the end of this tutorial, you’ll understand how to enable your extension to contribute tools that can be called by Copilot in all modes, but especially in Agent mode. We’ll continue building upon our pirate/Yoda parrot example to demonstrate these concepts in practice.
Tip
The complete source code for this tutorial series is available on GitHub. These posts will guide you through building this extension step-by-step, from initial setup to the final version you see in the repository.
This simple example extension acts like a chat parrot, repeating what you type in the chat window. You can optionally have it repeat your message in pirate or Yoda style.
Adding tools support
To add a tool to your extension, we need to do two things: declare the tool in the manifest and implement the handler to execute the tool and return the result.
Configuring the tools on the manifest
Open the package.json file and add a languageModelTools element inside contributes.
For our parrot extension, we will add two tools:
sayParrotName: A tool that returns the name of the parrot when called. To make things more interesting, the name of the parrot will be randomly selected from a list of names.repeatLike: A tool that repeats a given text in the style of different characters like Yoda, parrot, pirate, or other styles. This is similar to the@parrotparticipant withlikeapirateorlikeayodaslash commands that we implemented in the previous post. However, it can now be used in any context, not just in Ask mode. It also has the advantage of being able to talk like other characters, not just Yoda or a pirate, since the tool receives the text and the style as parameters making it generic.
Let’s add this to package.json (inside contributes):
"languageModelTools": [
    {
        "name": "tspascoal-copilot-chat-parrot-say_name",
        "displayName": "Say the name of the parrot",
        "toolReferenceName": "sayParrotName",
        "canBeReferencedInPrompt": true,
        "modelDescription": "When asked to say the parrot name or asked what is the parrot name"
    },
    {
        "name": "tspascoal-copilot-chat-parrot-repeat_like",
        "displayName": "Repeat text in different styles",
        "toolReferenceName": "repeatLike",
        "canBeReferencedInPrompt": true,
        "modelDescription": "Parrot or repeat text in the style of different characters like Yoda, parrot, pirate, or other styles. Takes parameters: text (string) and like (string)",
        "inputSchema": {
            "type": "string",
            "properties": {
                "text": {
                    "type": "string",
                    "description": "The text to be repeated"
                },
                "like": {
                    "type": "string",
                    "description": "The style we are going talk like"
                }
            }
        }
    }
]
The sayParrotName is rather unremarkable, it simply returns the name of the parrot when called. But the repeatLike tool is more interesting. It defines two inputs (text and like) that allow the user to specify the text to repeat and the style in which to repeat it. The model will infer these values from the prompt and pass them to the tool when called in a structured manner.
The modelDescription is fundamental to tool calling. It’s the description that allows the model to understand when to call the tool. It should be clear and concise, describing the expected behavior of the tool. It should also include the expected parameters and their types (even though they can be defined in inputSchema). This is what the model will use to determine when to call the tool and how to format the input.
When you write a prompt in agent mode, all tools (that are enabled) will be available to the model so it knows which tools it can potentially use.
Once you define the tools in the manifest, the tools will be listed in the tools list (but calling them will fail since we have not implemented them yet).
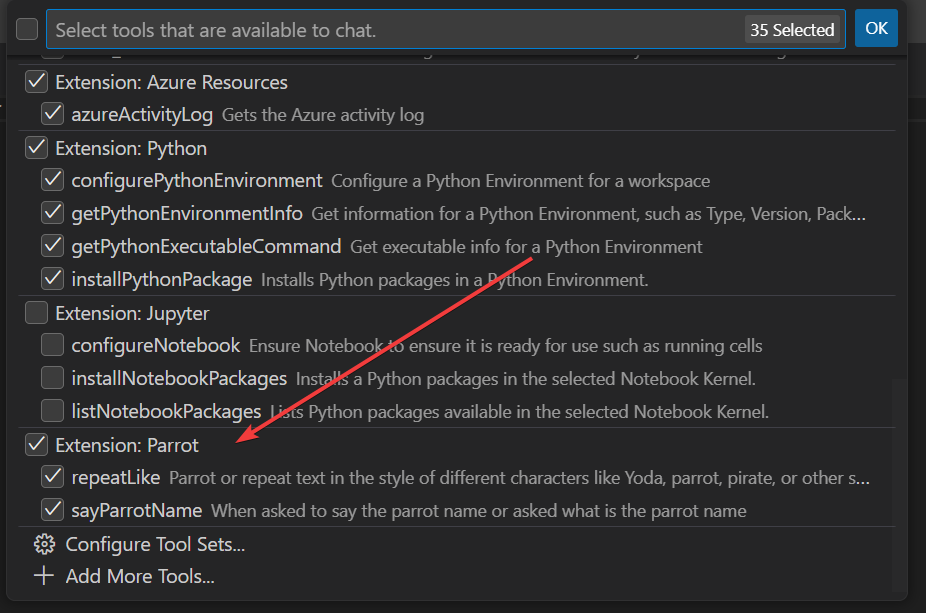
You can also add the tools to the context or reference them in the chat using the # (e.g., #sayParrotName) like in the screenshot below
Implementing the tools
Now that we have registered the tools, we need to implement them, which is quite easy, all we need is to call vscode.lm.registerTool and pass the tool name and a handler function that will be called when the tool is invoked.
Let’s add these two lines to activate method in extensions.ts
const sayNameTool = vscode.lm.registerTool('tspascoal-copilot-chat-parrot-say_name', new parrotSayNameTool());
const repeatLikeTool = vscode.lm.registerTool('tspascoal-copilot-chat-parrot-repeat_like', new parrotRepeatLikeTool());
The parrotSayNameTool and parrotRepeatLikeTool are classes that implement the vscode.LanguageModelTool interface. They should implement the execute method that will be called when the tool is invoked. So let’s implement them in repeatliketool.ts.
Input interface
Start by defining the inputs interface for the repeatLike tool. This will help us define the expected input structure and types for our repeat like tool:
interface RepeatLikeParameters {
    /**
     * The text to repeat/transform
     */
    text: string;

    /**
     * The style to repeat the text like (e.g., "yoda", "parrot", "shakespeare", etc.)
     */
    like: string;
}
Tool handlers
We need to implement our parrotRepeatLikeTool, so we start by defining a class that implements the generic vscode.LanguageModelTool interface with a RepeatLikeParameters type (the input parameter).
export class parrotRepeatLikeTool implements vscode.LanguageModelTool<RepeatLikeParameters>
Then we need to implement two methods:
invoke: This method is called when the tool is invoked; it receives the input parameters and should return avscode.LanguageModelToolResultobject with the result of the tool invocation.prepareInvocation: Optional method that can be used to prepare the tool invocation; it shows the user a nice message asking for their consent to run the tool. If you don’t specify this method, the default message will be used.
Let’s start with the invoke method, which will simply repeat the text in the style specified by the user OR use the Copilot model to generate the text in the specified style.
If the specified style is parrot, we will just return the text as is, otherwise we will use the LLM to transform the text in the specified style, just like the original @parrot participant did.
async invoke(
    options: vscode.LanguageModelToolInvocationOptions<RepeatLikeParameters>,
    token: vscode.CancellationToken
): Promise<vscode.LanguageModelToolResult> {
    const { text, like } = options.input;

    if( !text || !like) {
        throw new Error("Both 'text' and 'like' parameters are required.");
    }

    if( like.toLowerCase() === 'parrot' ) {
        // Special case for parrot, use a simple transformation
        return new vscode.LanguageModelToolResult([
            new vscode.LanguageModelTextPart(text)
        ]);
    }

    const transformedText = await this.transformWithLLM(text, like, token);

    return new vscode.LanguageModelToolResult([
        new vscode.LanguageModelTextPart(transformedText)
    ]);
}
For brevity I will not include the transformWithLLM method implementation here, but you can see the implementation on the sample repository.
Now let’s add the (optional) prepareInvocation method, which will show a message to the user asking for their consent to run the tool. This is optional, but it can be useful to inform the user about what the tool will do before running it.
async prepareInvocation(
    options: vscode.LanguageModelToolInvocationPrepareOptions<RepeatLikeParameters>,
    token: vscode.CancellationToken) {

    const { text, like } = options.input;

    if (!text || !like) {
        throw new Error("Both 'text' and 'like' parameters are required.");
    }

    return {
        invocationMessage: `Parroting "${text}" like ${like}...`,
        confirmationMessages: {
            title: "Parrot Like",
            message: new vscode.MarkdownString(`Would you like me to parrot "${text}" in the style of ${like}?`),
        }
    };
}
Calling the tools
So now we have all the necessary pieces in place to call the tools. You can call them directly from the chat using the tool name, by calling it with # or use natural language in agent mode.
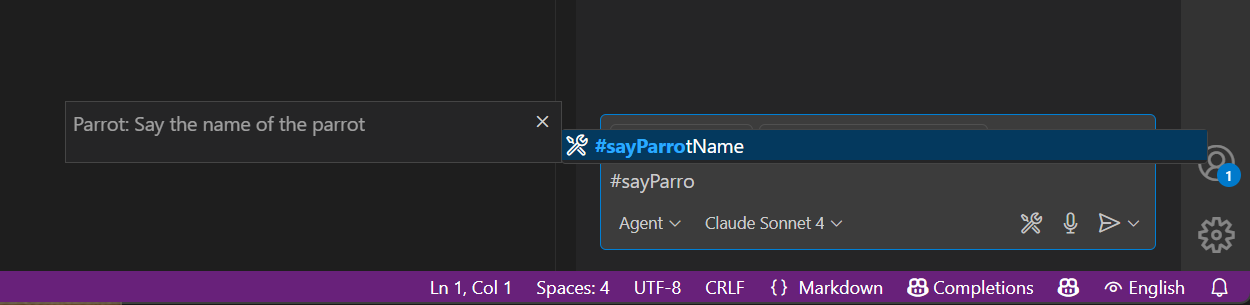
sayParrotName
Let’s call our sayParrotName tool in the chat. You can do this by typing #sayParrotName in the chat input box, or you can use natural language like “What is the parrot name?” or “Say the parrot name”. Let’s use the first method.
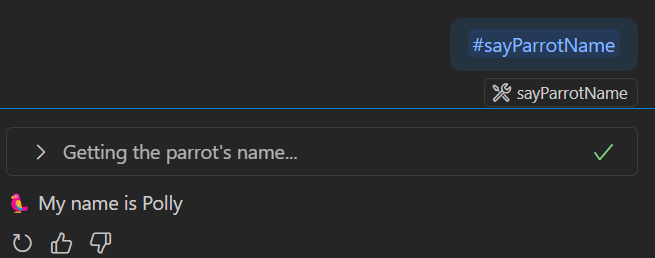
You can see the tool name in the references and the result in the chat. The tool returned the name of the parrot, which is randomly selected from a list of names.
repeatLike
But calling the tool explicitly is not very user-friendly, and it’s not a significant improvement over calling the @parrot participant. Although it is a lot more flexible, since it works in any mode, not only ask mode, and can be intertwined in the prompts.
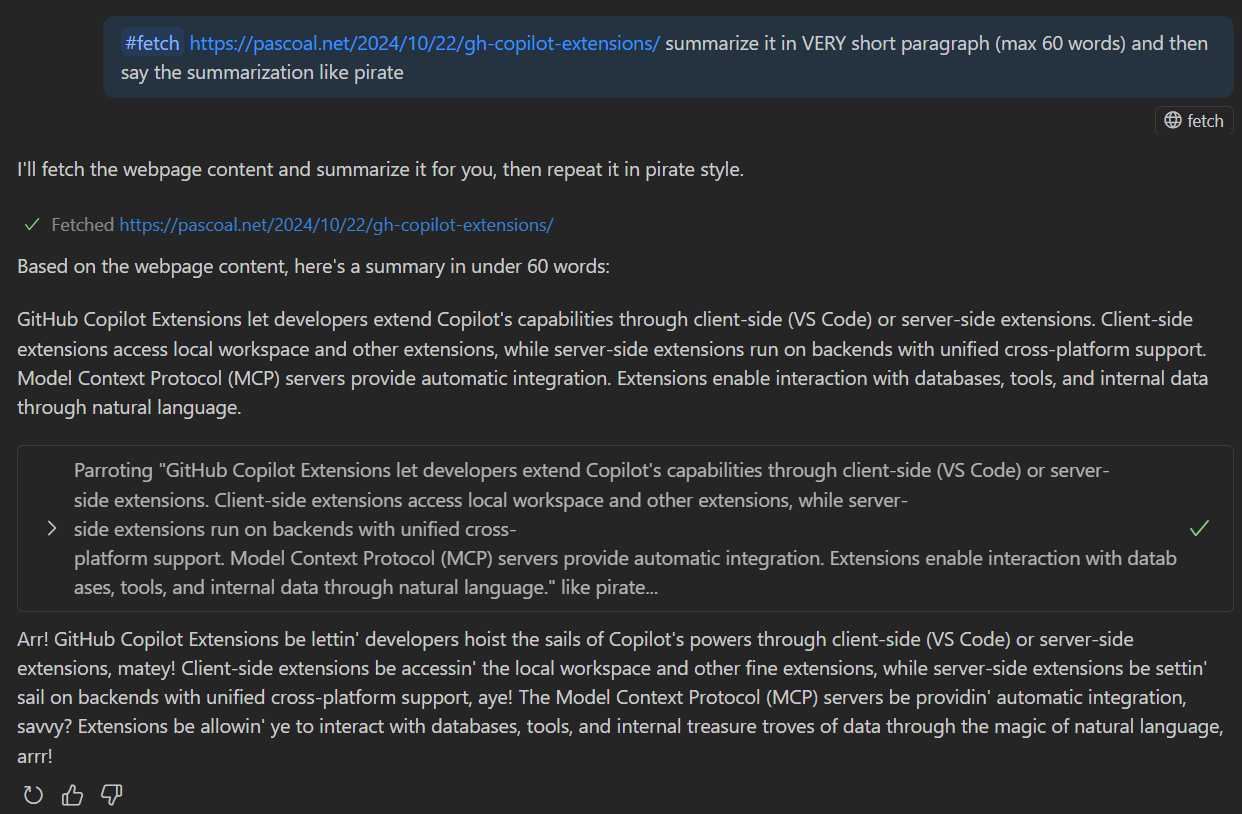
So let’s try to call the repeatLike tool in a more natural way, and more interestingly, let’s use it in Agent mode with a prompt that also uses other tools thus combining several tools and model usage.
Let’s try the prompt: #fetch https://pascoal.net/2024/10/22/gh-copilot-extensions/ summarize it in VERY short paragraph (max 30 words) and then say the summarization like pirate
So here we combine the fetch tool to fetch the content of the page, then ask the model to summarize the result of fetching pascoal.net/2024/10/22/gh-copilot-extensions/ and after the summary, parrot it like a pirate (but not specifying the tool explicitly—we rely on the model to understand our intent and use the repeatLike tool based on our prompt text).
Alternative approach: implement an Model Context Protocol server
We have shown how to add tools support to a VS Code extension using the Language Model Tool API. But there are other ways to implement tools support in a VS Code extension, one of them is to implement an Model Context Protocol (MCP) server that can be used by the Copilot model to call the tools. By implementing an MCP server on an extension, there is no need for installation or configuration—it will be automatically available to the model and the user once the extension is installed.
Implementing an MCP server, although more complex to implement than just the tools (but not much more), has extended benefits, since it not only allows implementation of tools but also allows implementation of other features supported by MCP like:
- Prompts: Predefined templates or structured instructions that guide how tools and resources are used. Prompts help standardize workflows, ensure optimal tool usage, and can encode best practices for specific actions (e.g., how to file a bug report or summarize a document) and can be called directly by the users.
- Resources: Read-only data sources (e.g., files, database records, knowledge bases) which users can add as chat context. Resources provide structured context or reference data—like a REST API GET endpoint—without side effects. This allows models to retrieve up-to-date information and context, improving relevance and accuracy.
- Sampling: Unlike traditional tool calling (where the model always calls the server), MCP allows the server to request a language model completion (“sampling”) from the client. This reverses the usual flow: the server can leverage the client’s LLM for tasks like text generation, classification, or summarization, while the client retains control over model choice, privacy, and resource limit
- Elicitation: Elicitation is a powerful feature that allows the server to request specific information from the client, such as user preferences or configuration settings. This enables the server to adapt its behavior based on user input, enhancing the overall user experience and making the server more responsive to individual needs.
- Workspace roots: Information about the user’s workspace structure
See how to implement an MCP server in a VS Code extension in the MCP developer guide.
Info
Learn more about MCP
Agent TODOs is an excellent example of a VS Code extension that implements an MCP server.
References
Next In Series
Next up: extensibility topics not included but that you should consider when building your extension. Stay tuned!