GitHub Codespaces: Developing GUI Applications 2/3
Second post of a series of three about running GUI applications on GitHub Codespaces.
VNC
The first way is to use VNC. VNC is a graphical desktop sharing system that uses the Remote Frame Buffer protocol (RFB) to remotely control another computer. It transmits the keyboard and mouse events from one computer to another, relaying the graphical screen updates back in the other direction, over a network.
So we need to install a VNC server on the Codespaces environment and a VNC client on our machine. There are several VNC clients. For this example I will use TigerVNC Viewer, which is Open Source and available for Windows, Linux and MacOS.
Installing VNC server on Codespaces
You can manually install the VNC server on the Codespaces environment or you can use a feature to install it for you.
Note: DevContainer features are self-contained units of installation code, container configuration, and/or settings and extensions designed to enable new development capabilities in your dev container. They can be built to work with a wide range of base container images, you can use pre-created features or author your own.
Since I don’t want to manually install the VNC server and install/configure a windows manager, I will use the desktop lite feature that is available on the devcontainers repository.
This feature installs a VNC server and light weight desktop based on flubox.
From Wikipedia, Fluxbox is a stacking window manager for the X Window System, which started as a fork of Blackbox 0.61.1 in 2001, with the same aim to be lightweight. Its user interface has only a taskbar, a pop-up menu accessible by right-clicking on the desktop, and minimal support for graphical icons.
All you need to install the feature is to add the following content to your devcontainer.json file:
"features": {
    "ghcr.io/devcontainers/features/desktop-lite:1": {}
},
"forwardPorts": [5901],
  "portsAttributes": {
		"5901": {
      "label": "VNC desktop"
		}
	}
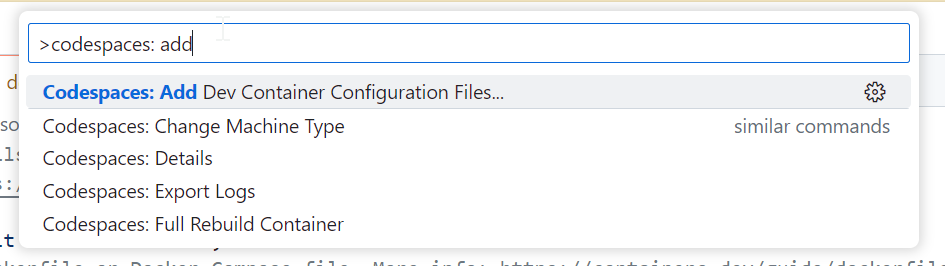
If you don’t have a devcontainer.json file yet, you can create one by running the command Codespaces: Add Development Container Configuration Files... from VS Code command palette.
Once you have updated the devcontainer.json you need to rebuild the container (don’t forget push the changes once you are happy with the result).
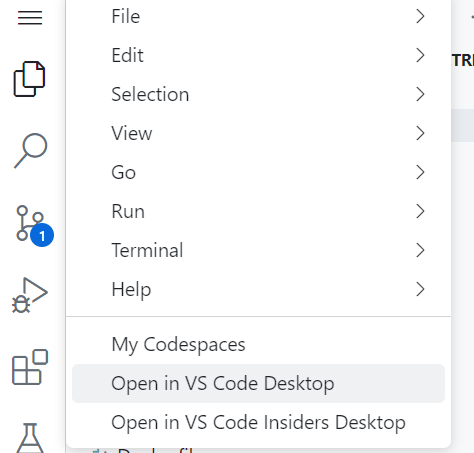
After the container is rebuilt open the Codespace in VS Code Desktop (This step is crucial).
If you open the PORTS pane you should see that the VNC server is running on port 5901.

Connecting to Codespace with VNC
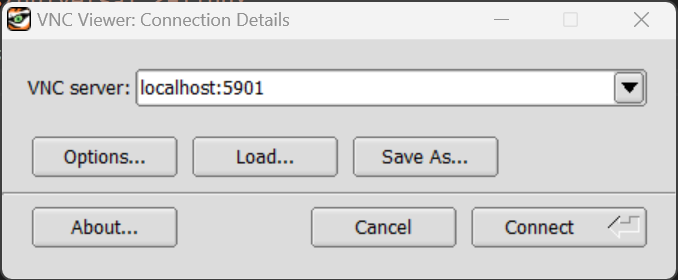
Let’s now connect to the VNC server. Open TigerVNC Viewer and connect to localhost:5901.
You will get a warning that the connection is not secure and a password input. The default password is vscode but you can change it on the devcontainer.json file. (see for more details).
You now have a connection to the Codespace container, notice on the buttom there is a taskbar with a terminal menu.
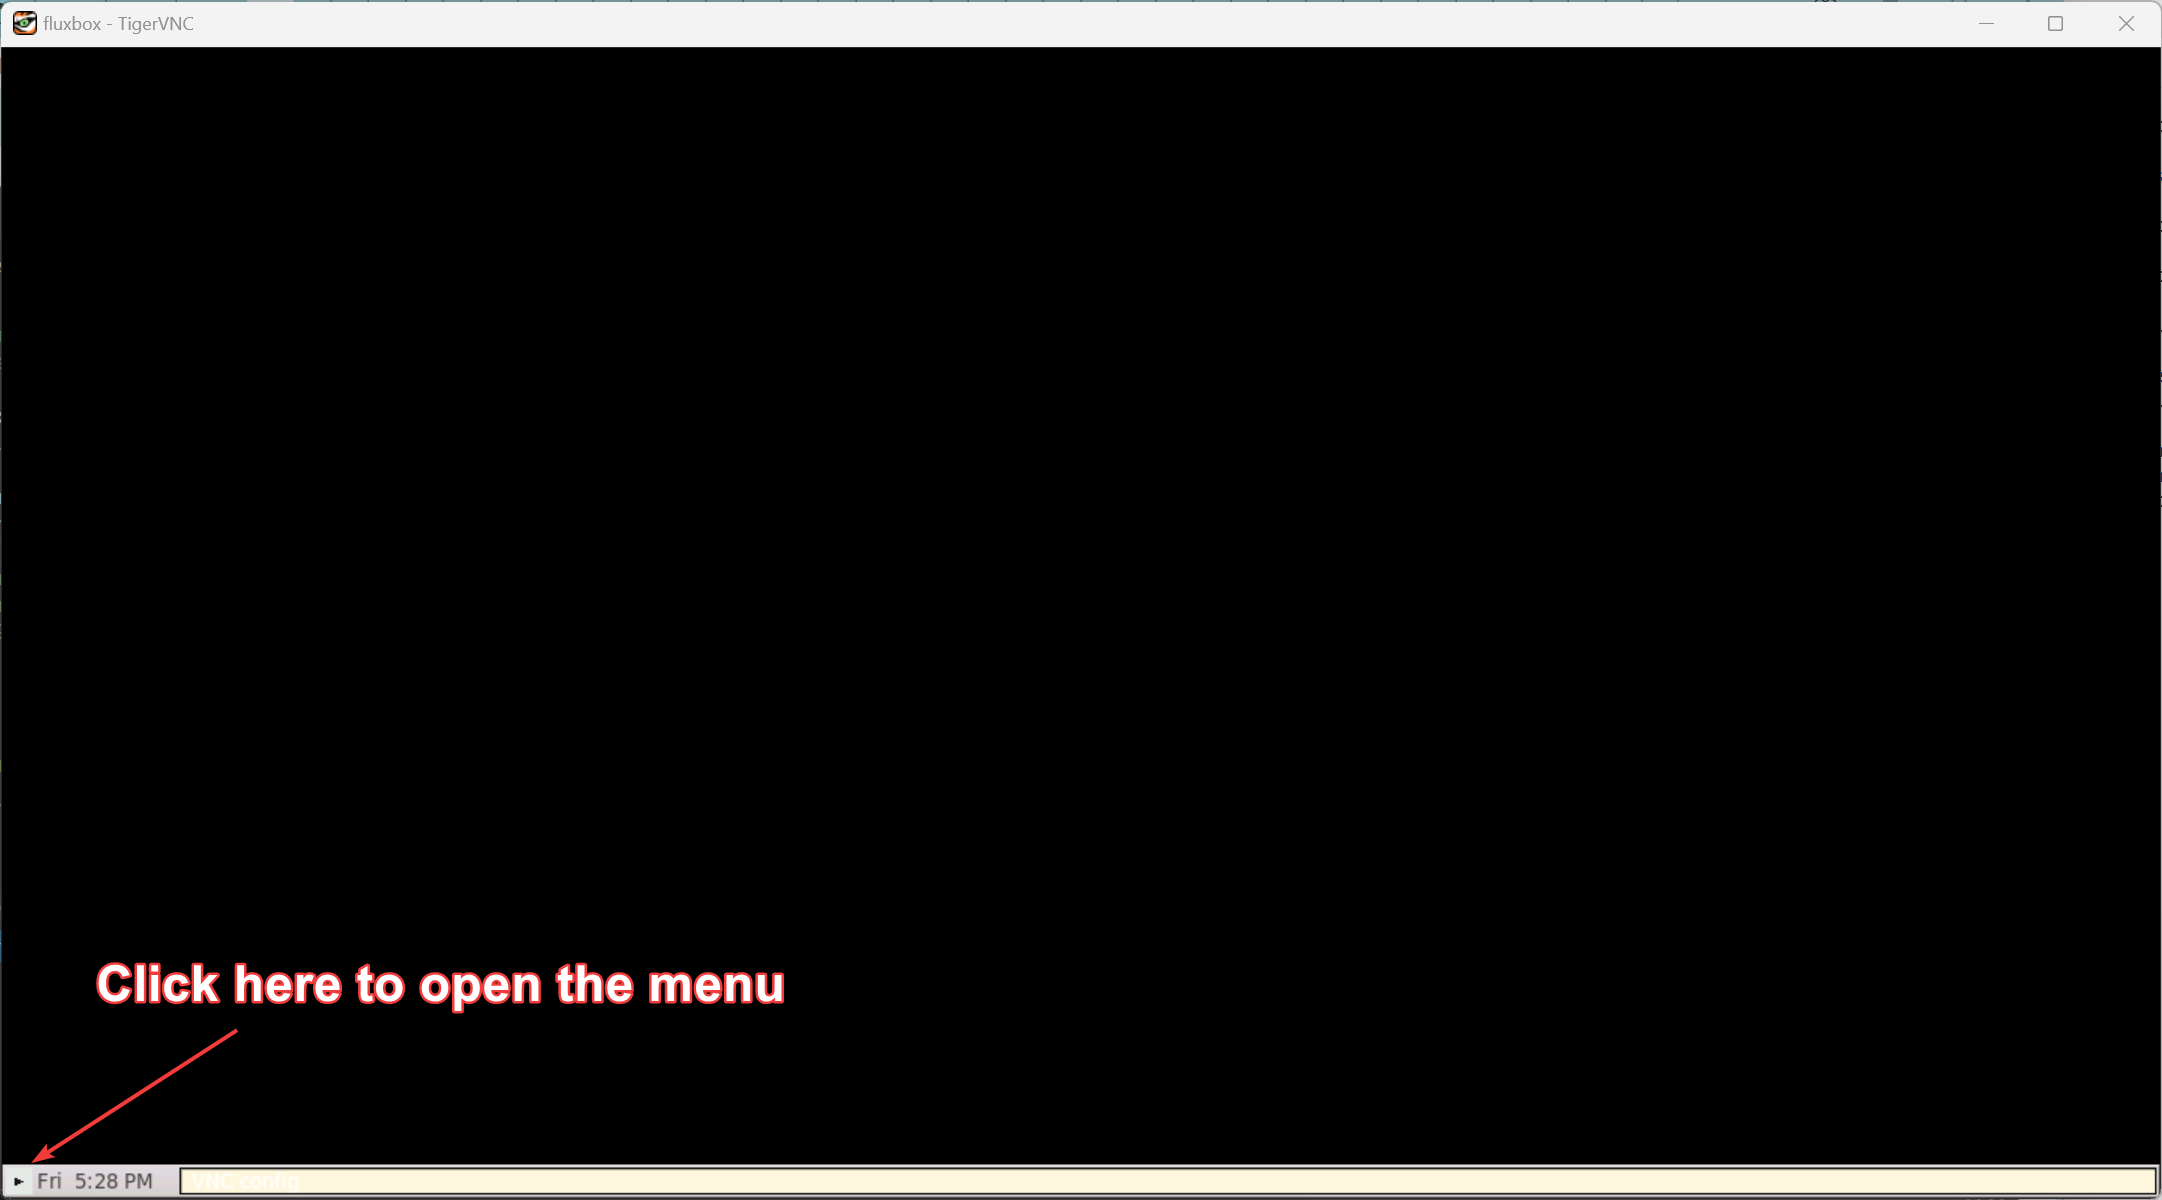
Launch the File Manager or a terminal from the menu for example.
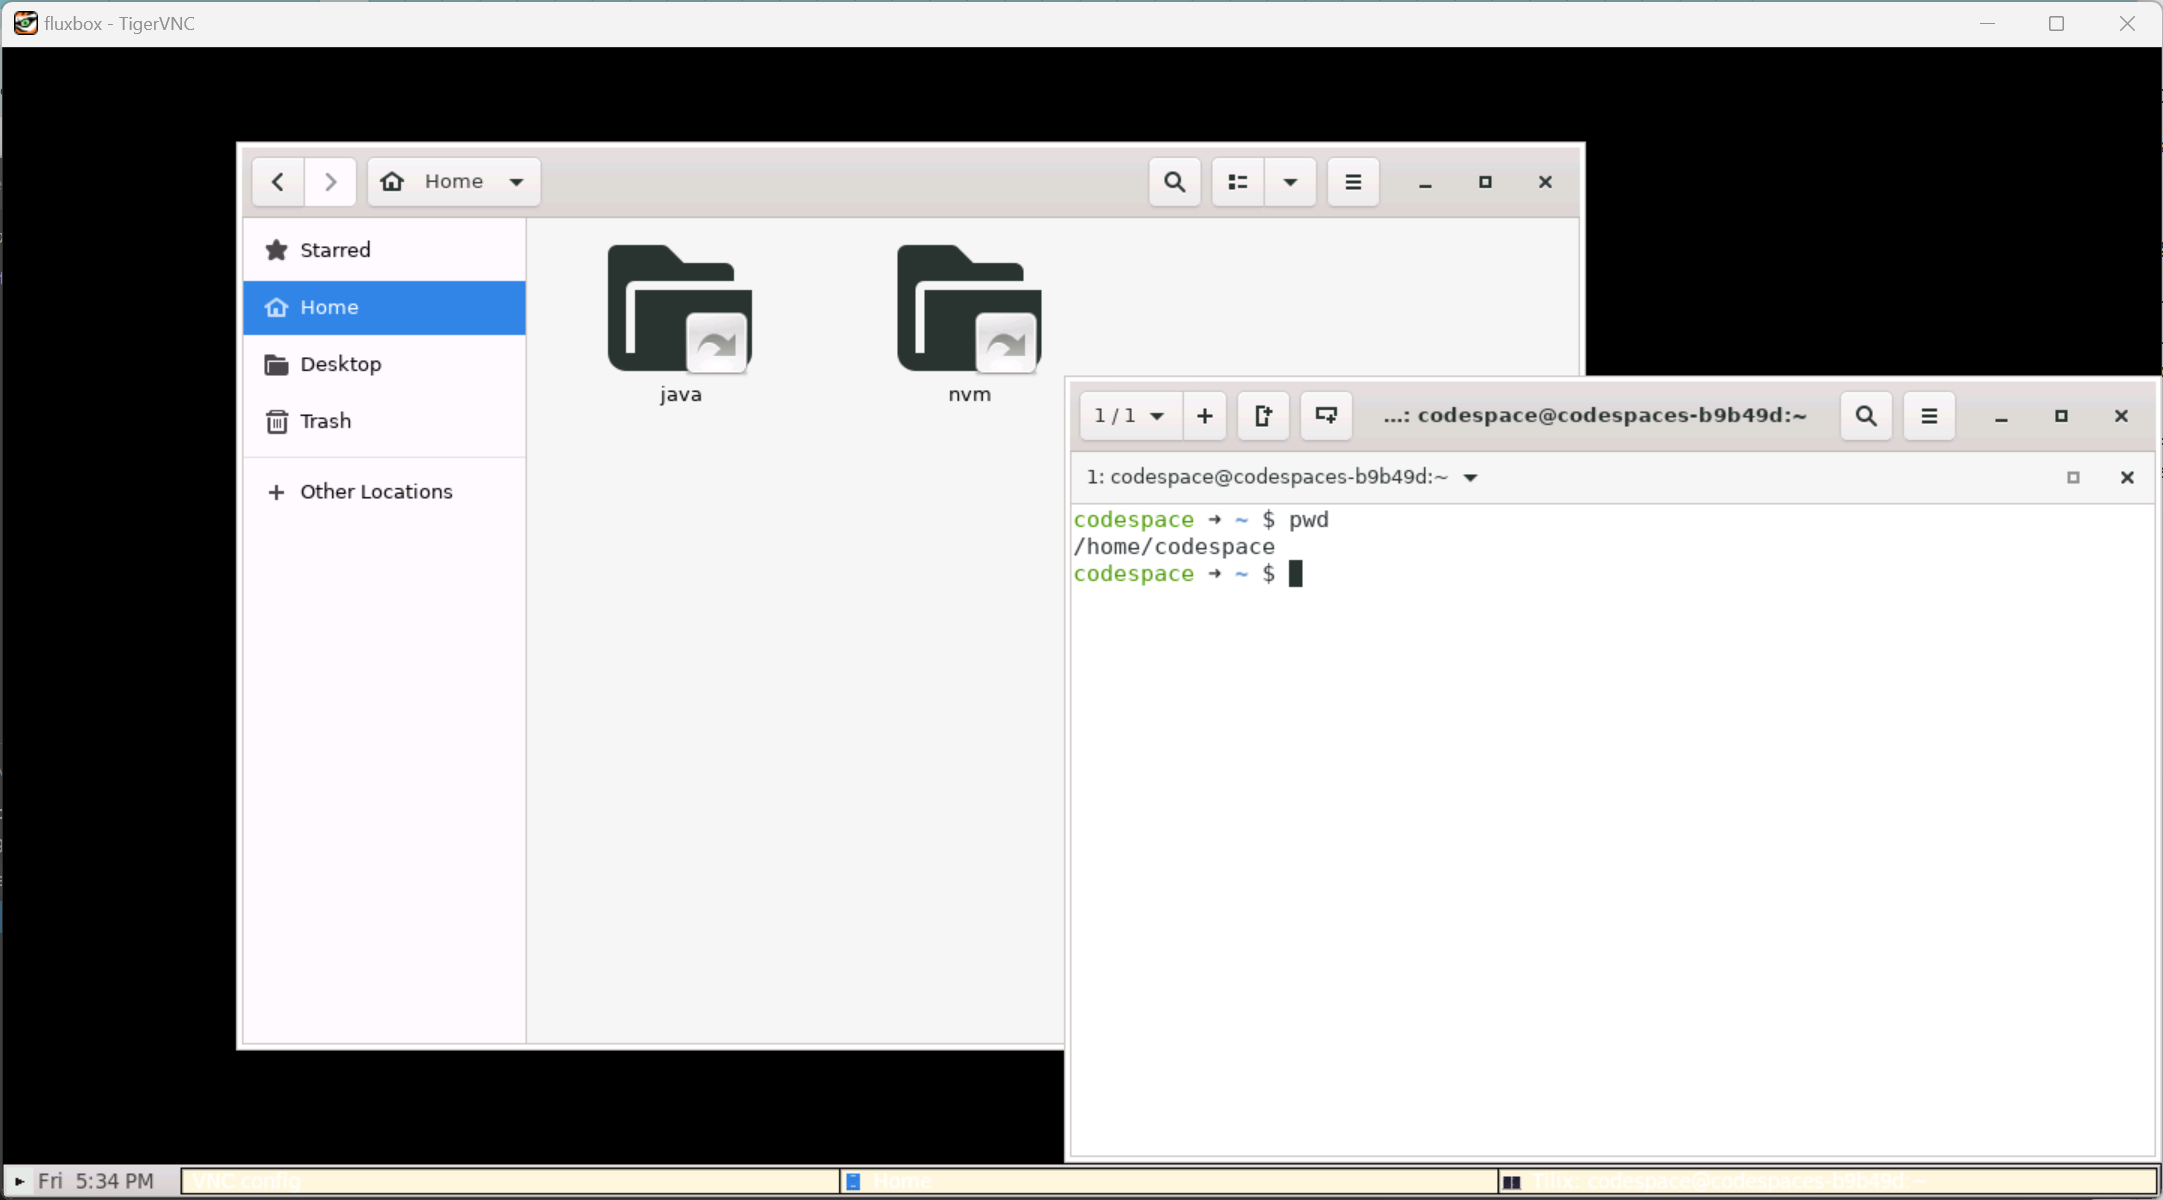
and watch the magic happen, now you are ready to start developing any Application that has a GUI.
These are the steps to configure desktop-lite feature on your Codespace, but you can do it exclusively using the wizard (yeah I save the spoilers for the end), here is a short video how an a repository without devcontainer.json :)
This is done in a freshly created Codespace
A little simpler isn’t it? :)
For references here is the full devcontainer.json that I’ve used, it uses devcontainer default image, which is the image that is used when your repo doesn’t hasve a devcontainer.json and you create a Codespace.
{
	"image": "mcr.microsoft.com/devcontainers/universal:2",
	"features": {
		"ghcr.io/devcontainers/features/desktop-lite:1": {}
	},
	"forwardPorts": [5901],
  "portsAttributes": {
		"5901": {
      "label": "VNC desktop"
		}
	}
}
Tip: You can check the content of the default image here.
Why did I open the Codespace in VS Code Desktop? Because this way VS Code forwards the local port on my machine to the container port transparently, so I can connect to VNC from my machine without requiring authentication, if the codespace was open in the web browser I would need to authenticate which we can’t do since it requires sending an HTTP header or make the port public which wouldn’t work either since the forwarded port on the web version only works for HTTP and not TCP.
Learn more in Forwarding ports in your codespace
Last Remarks
This method is an effortless way to configure your Codespace todevelop GUI applications, but it has some drawbacks:
- Although desktop-lite feature is well … light, it still requires some resources.
- Fluxbox which destkop-lite uses is simple ad it is litte a bit outdated, which may not be a problem since it’s probably not going to be used as a desktop but only for developing/testing your applications.
- You need to run a VNC client which spends some real estate since it displays the full remote desktop on a window. It might not a problem if you have multiple monitors but if you don’t it can be a bit annoying to switch between the code editor and the desktop.
Head to the next post for a different approach using an X11 server.